Eubrewnet’s products are processed using the configurations stored in its data server. These configurations include at least the same information as the standard ICF files. In this guide we briefly describe how to create a new configuration or update an existing one. More information can be found in the User Manual at the Eubrewnet Wiki.
1. The Configuration List
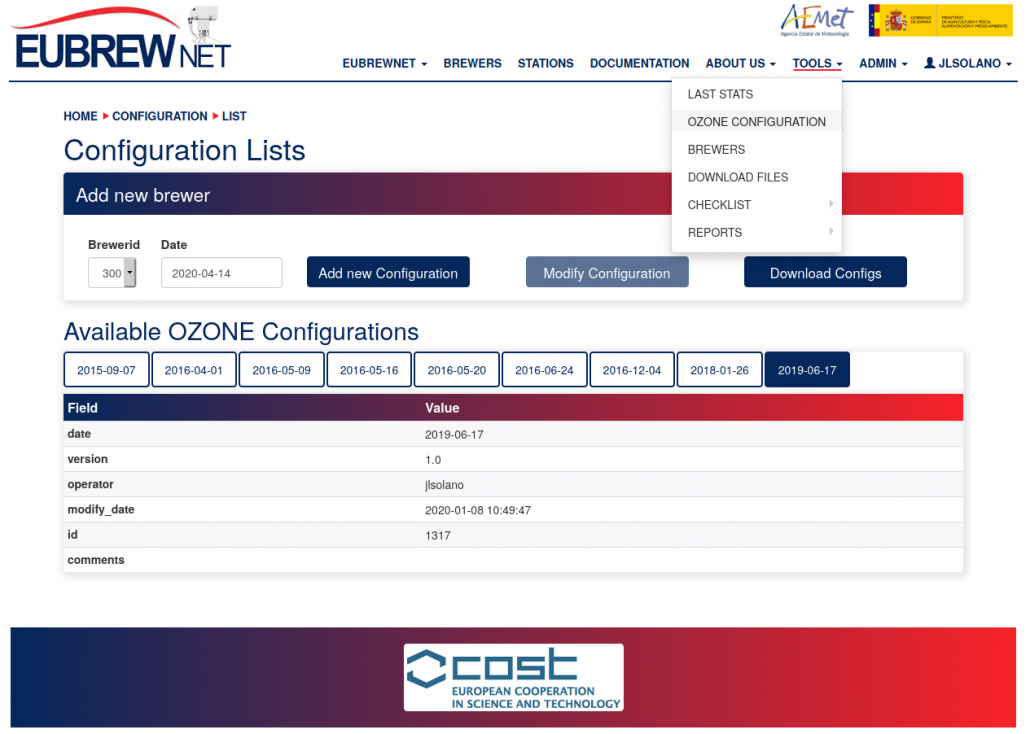
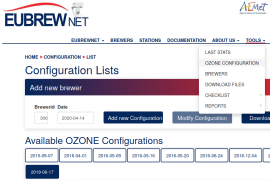
After login at http://rbcce.aemet.es/eubrewnet/, use the menu bar near the top of the page and navigate to Tools → Ozone Configuration to reach the Configuration List page.
In this page you should first select your Brewer from the Brewerid drop-down list. If your Brewer is not listed, your registration has not been completed yet — please contact us at eubrewnet@aemet.es
Once a Brewer is selected, you will see buttons labelled with dates below the Available Ozone Configurations title bar. These are the dates at which the configurations become operative. You can click on each Configuration button to get some basic metadata, such as who and when the configuration was created.
At this point you have two options: either create a new configuration or update an existing one.
2. Creating a new Configuration
Next to the Brewerid drop-down list there is a Date field. By default, today’s data is written in this field, but you should write there the date at which your new configuration becomes operative. The date format is YYYY-MM-DD.
Once you have filled the Date field, click on the button next to it, aptly labelled Add New Configuration. This will take you to the Configuration Upload page.
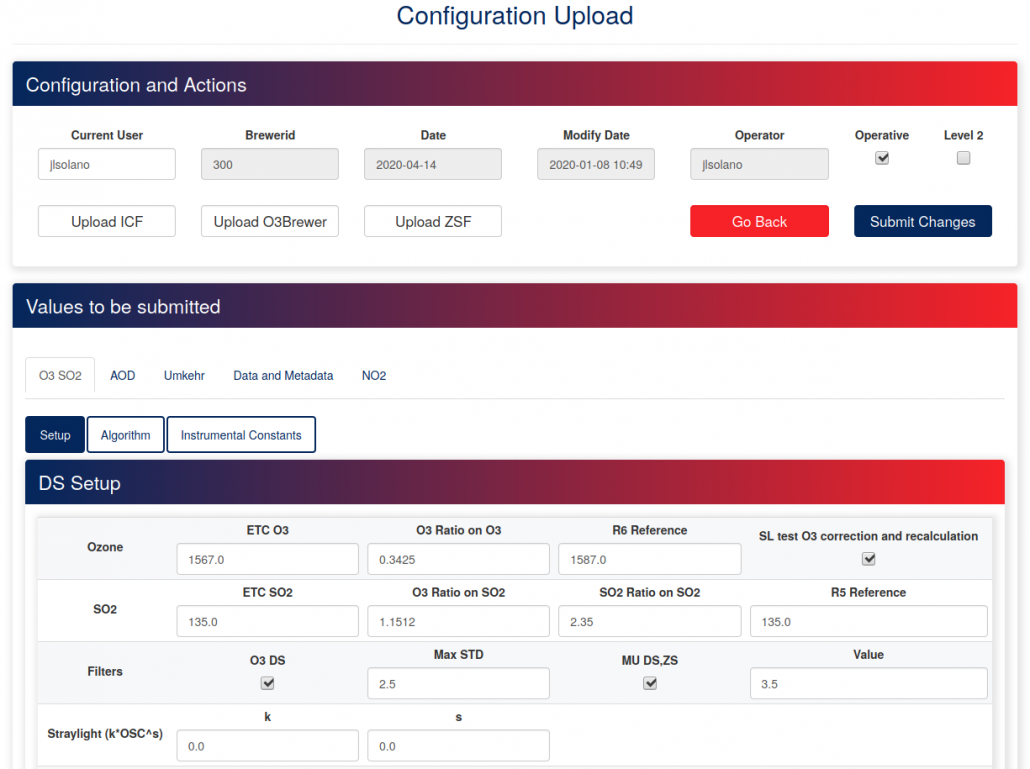
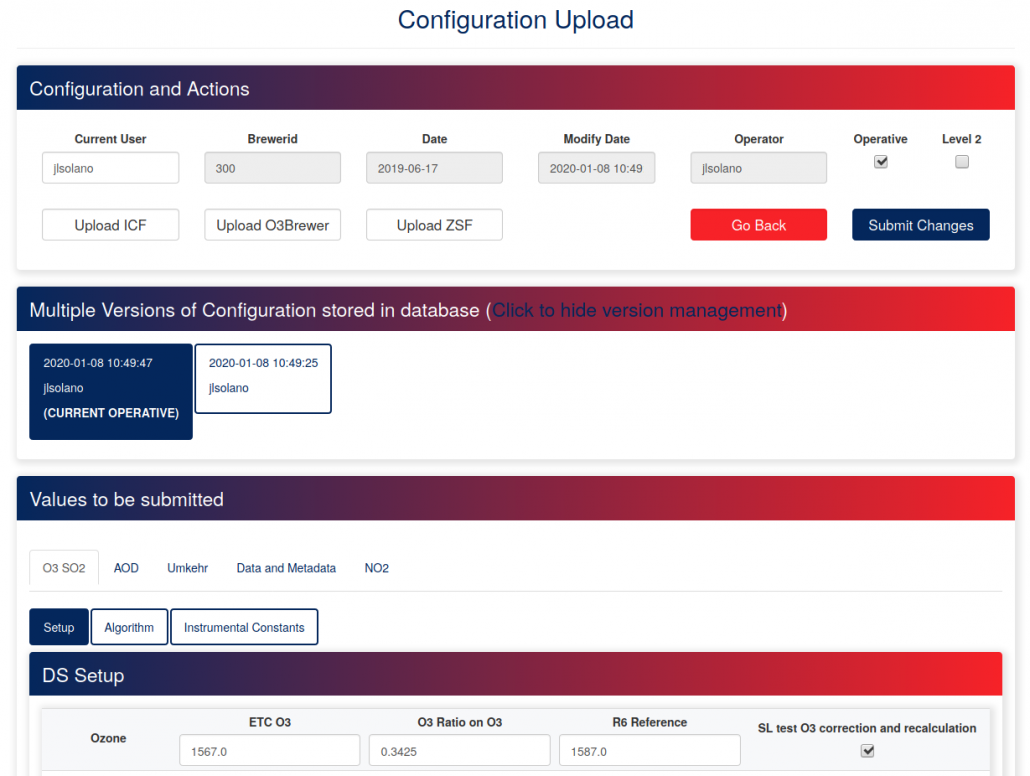
At the top of the page, the Configuration and Actions section shows some basic information on the configuration. Please, make sure that the Date field is correct — you can’t change the date from this page, so if it’s not correct, click on red Go Back button to return to the previous page.
Note also the Operative and Level 2 tick boxes. In case there is more than one configuration defined for the same date, Operative tick box will be ticked for the currently operative configuration — we provide more details in next section. Click on the Level 2 tick box if the current configuration has already been validated and can be used to process the Level 2.0 product.
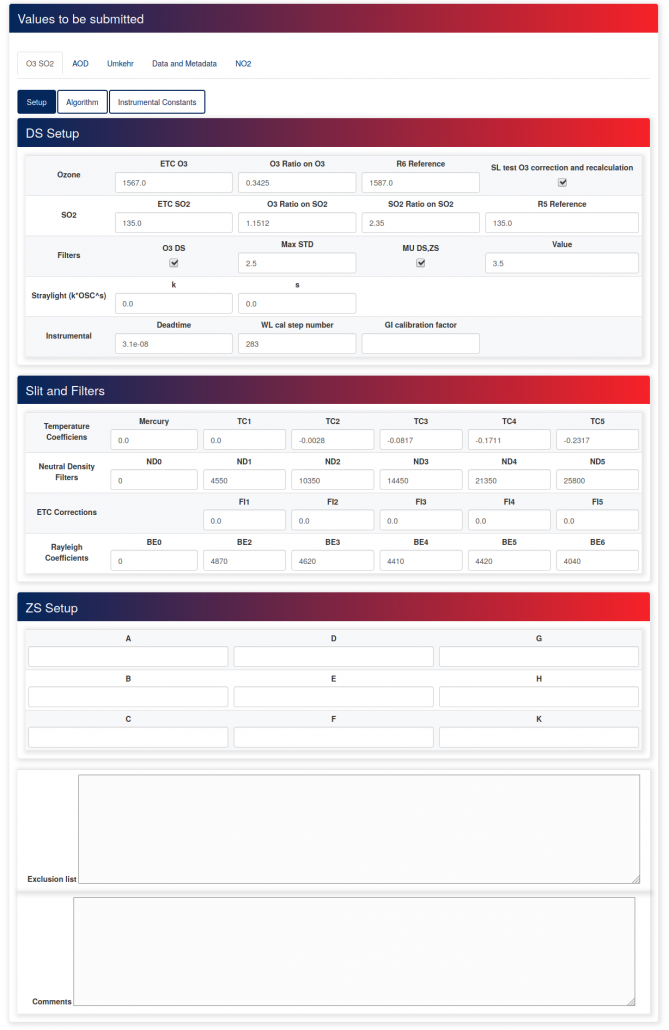
Below Configuration and Actions you will find the Values to be submitted section. This is were all the parameters of the configuration are defined. Note that the parameters are organized in five main groups, with tabs labelled O3 SO2, AOD, Umkher, Data and Metadata, and NO2. For now, we will focus in the first group, the parameters of the Ozone configuration.
It is very likely that the parameters of the configuration will already display some values. These correspond to a configuration operative before the one you are creating. If there is more than one previous configuration, the closest in time will be used.
You can now edit all the parameters by hand. Note that there are three groups: Setup, Algorithm, and Instrumental Constants. If you have previously used an ICF file, you should be familiar with most of them. Others, like the Stray Light parameters, or the ETC corrections are issued by the RBBC-E at its Intercomparison Campaigns — for further information, please contact us at eubrewnet@aemet.es
Note that you can find a full list of parameters, plus a brief description of them, at the Eubrewnet Wiki, in the Eubrewnet Configuration section.
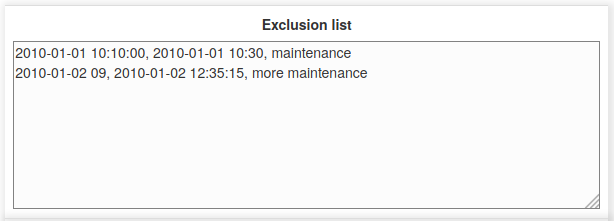
Below the fields for the parameters of the configuration, you will find two text boxes, named Exclusion list and Comments. The latter is just that — space to write comments regarding the configuration. In the Exclusion list box you can enter date ranges which will be excluded from the standard output of the Level 1.5 and 2.0 products. A complete explanation of the Exclusion list is available at the Eubrewnet Wiki, in the Eubrewnet Configuration section.
Besides filling the configuration parameters by hand, you can also upload a file with them — in the upper part of the page, in the Configuration and Actions section, you will find the Upload ICF, Upload O3Brewer and Upload ZSF buttons.
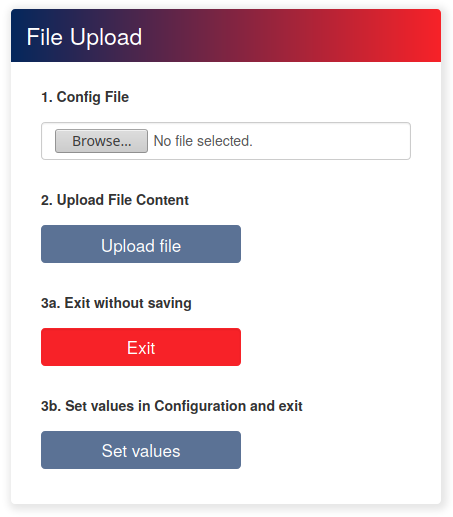
Clicking in the Upload ICF button will open the File Upload pop-up. This pop-up will guide you through the process of uploading an ICF file and inserting it’s data in the current configuration.
Following the steps of the File Upload pop-up in order, first click on the Browse button and locate the ICF file in your computer. Next click on the Upload file button. At this point you have two options: either abort the process by clicking on the red Exit button, or click on Set values to continue and insert the data from the uploaded ICF file in the current configuration.
Clicking on the Upload O3Brewer or Upload ZSF buttons will also take you to the same File Upload pop-up. Please select the appropriate file in the first step. The parameters read from each file are listed in the Eubrewnet Wiki, Eubrewnet Configuration section.
Once you have set all the parameters of the configuration, go back to the top of the page and look for the blue Submit Changes button. Once you click on the button, a confirmation message will pop-up, telling which data is going to be reprocessed because of the changes you have made, and giving you one last opportunity to cancel the whole process.
Note that the Submit Changes pop-up gives tells you which product levels will be affected by the changes to the configuration — changing the ETC will affect from Level 1 onward, but changing the Stray Light parameters will only affect from Level 1.5 onward. If you’re creating a new configuration, all levels will be affected. The pop-up will also let you know which dates will be affected. This date range will start on the day defined in the Date field, and end on the day before the next configuration becomes active or, if there is none, the current date.
Processing the data will take some time. You will receive an email once it’s done.
3. Updating a Configuration
As mentioned in the first section of this guide, the Configuration List page will show buttons labelled with the operative dates of all the configurations defined for one Brewer.
When you click on one of these configurations, the blue Modify Configuration button (located next to the Add new Configuration one) will be enabled. Clicking on it will take you to the same Configuration Upload page we described in the previous section.
Eubrewnet’s data server stores all the revisions made to the configuration operative at a certain date. If present, these revisions of the configuration are shown in Configuration Upload page, in the Multiple Versions of Configuration stored in database section.
Clicking on the different configurations will load its parameters. We recommend writing a meaningful description of the changes made to the different versions and the reason for doing them in the Comments text box.
Note you can select a previously inserted, non-operative configuration, and make it the operative one just by clicking on it and then on Submit Changes — you do not have to tick/un-tick the Operative tick box, the server will do that for you. In fact, clicking in the Operative tick box is highly discouraged unless you are completely sure of what you are doing!
Besides the selecting a previously inserted configuration, you also have the same two options as for creating a new configuration: you can either fill the values of the parameters by hand, or upload a file.
Once you have finished updating the parameters of the configuration, click on the blue Submit Changes button near the top of the page to save your configuration and make it operative. Once you click OK in the pop-up, the data re-processing will start. You will receive an email once its finished.


